Here's one of my favorite buildings.
3D model by - Radu Chiotan
2D textures by me
Monday, 30 January 2012
Friday, 20 January 2012
Sunday, 15 January 2012
Never too old
Thursday, 12 January 2012
New Pencils
Tuesday, 10 January 2012
Vlad Tepes / Dracula Concept
Saturday, 7 January 2012
WIP - Female character
Thursday, 5 January 2012
How to make a Custom Brush for Photoshop
Brushes can be a lot of fun and very helpful. Here are the steps to get new custom brushes to draw with.
In a new canvas draw anything that you would like to have it as a brush.
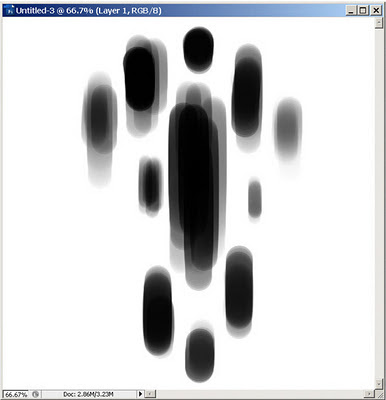
I used a default Photoshop Brush to make the desiderated shape.
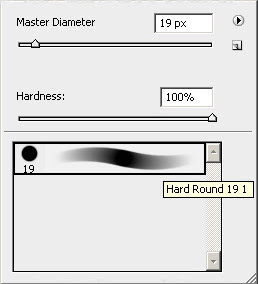
After you get the shape you want go to “Edit” and select “Define Brush Preset”.
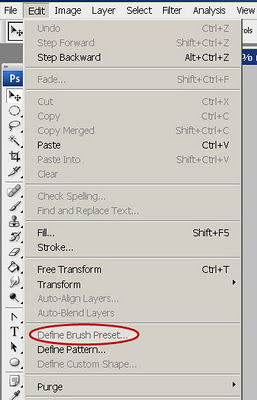
Give a name to your brush and click ok.
Now you have a new brush that you can play with it all the way you want.
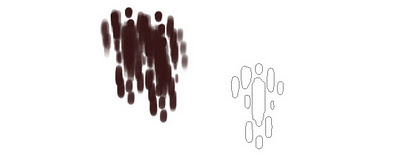
For more customization you can go to Window > Brushes (F5) and edit your brush more.
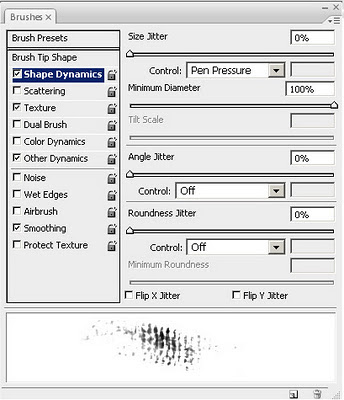
You can add a texture to it to make it grainier.
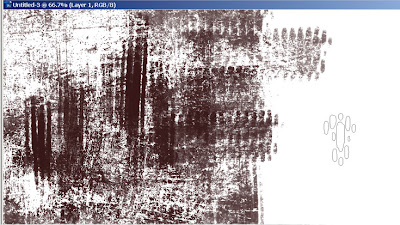
Add Other Dynamics to control Opacity and Flow or Shape Dynamics to adjust the brush shape.
Like this I got the result of a nice skin pores brush.
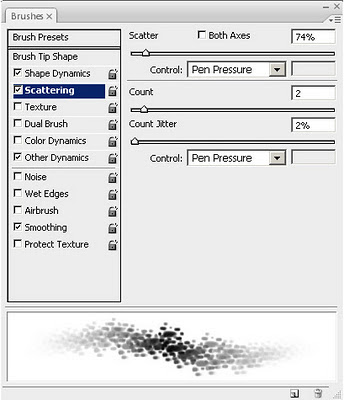
Also Color Dynamics is very nice to use. You can use it to get an interesting blend of colors.
For example if your Foreground Color is a light orange and you select the background color to a dark blue you can obtain a nice skin shade.
Once you like the result of your customization you Save the brush by clicking the Create New Brush button at the bottom of the Brushes window to have another variation of it.
I got a few variations from this brush.
You can also do way more customization.
Get this 3 brush pack: >DOWNLOAD<
I hope this helps :)
Enjoy!
In a new canvas draw anything that you would like to have it as a brush.
I used a default Photoshop Brush to make the desiderated shape.
After you get the shape you want go to “Edit” and select “Define Brush Preset”.
Give a name to your brush and click ok.
Now you have a new brush that you can play with it all the way you want.
For more customization you can go to Window > Brushes (F5) and edit your brush more.
You can add a texture to it to make it grainier.
Add Other Dynamics to control Opacity and Flow or Shape Dynamics to adjust the brush shape.
Like this I got the result of a nice skin pores brush.
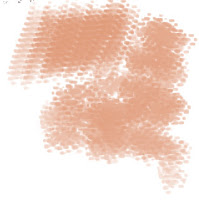
Also Color Dynamics is very nice to use. You can use it to get an interesting blend of colors.
For example if your Foreground Color is a light orange and you select the background color to a dark blue you can obtain a nice skin shade.
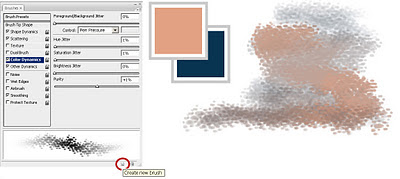
Once you like the result of your customization you Save the brush by clicking the Create New Brush button at the bottom of the Brushes window to have another variation of it.
I got a few variations from this brush.
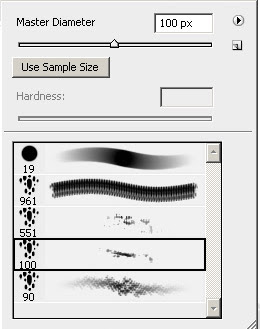
You can also do way more customization.
Get this 3 brush pack: >DOWNLOAD<
I hope this helps :)
Enjoy!
Subscribe to:
Posts (Atom)